Effective Ways to Use a Caulk Gun for Better Home Repairs in 2025
Using a caulk gun is an essential skill for any homeowner or DIY enthusiast. In 2025, mastering the art of applying caulk can enhance your home repair efforts, ensuring proper sealing of gaps and protecting your property from weather damage. This article will provide detailed insights on how to use a caulk gun effectively, including tips and techniques for applying caulk in various areas of your home.
Understanding Different Types of Caulk Guns
Choosing the right caulk gun can greatly influence your caulking experience. There are several types available, including manual, pneumatic, and heavy-duty caulk guns. Each serves a distinct purpose and can be beneficial for specific tasks.
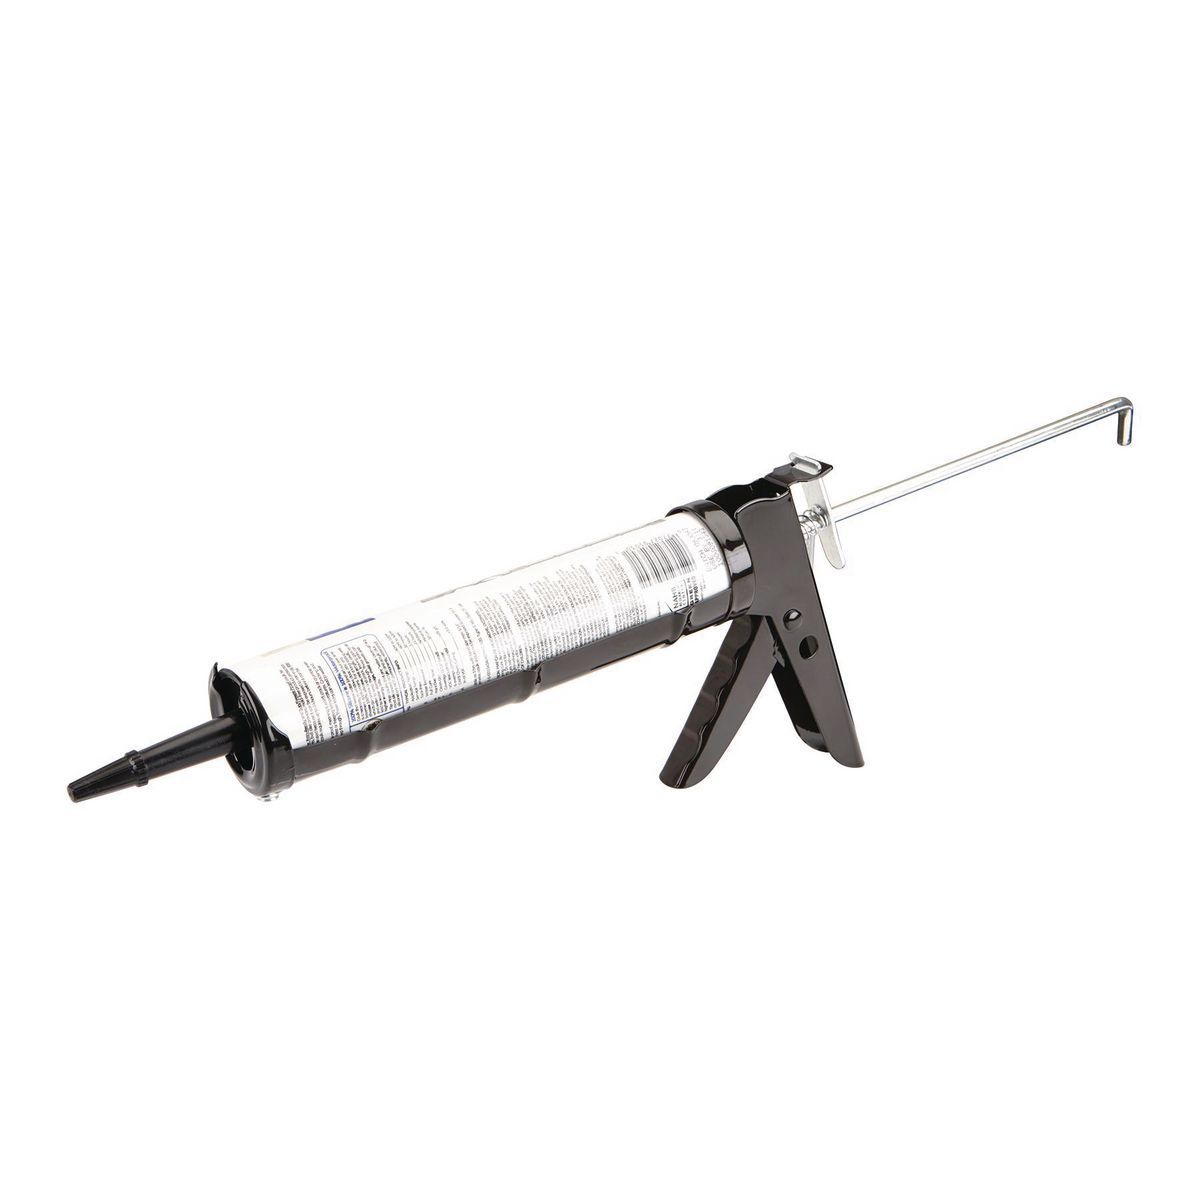
Manual Caulk Guns
A manual caulk gun is the most common type used by homeowners. It’s simple to operate: loading caulk is as easy as inserting the cartridge and pulling the trigger. When using a manual caulk gun, remember to apply gentle pressure for consistent caulk flow. This type is ideal for small projects like caulking bathroom fixtures or in caulking kitchen repairs. They are also lightweight, making them perfect for caulking surfaces that require finesse.
Pneumatic Caulk Guns
Pneumatic caulk guns use compressed air to dispense caulk, making them suitable for larger jobs where efficiency is key. This type also allows for better control over the caulk flow, which is crucial for applications requiring precision, such as sealing windows and doors. Learning how to use a pneumatic caulk gun can reduce hand fatigue and improve the quality of your work significantly.
Heavy-duty Caulk Guns
Heavy-duty caulk guns are designed for both professional contractors and serious DIYers. These are built to handle larger cartridges and deliver thicker, heavier caulks that a standard gun may struggle with. If you’re working on outdoor projects, such as caulking exterior surfaces, a heavy-duty caulk gun is invaluable. When choosing this type, consider the pressure adjustment features for varied caulk applications.
Ultimately, understanding the different caulk gun types will help you select the best tool, depending on your project requirements.
Preparing for Your Caulking Project
Preparation is crucial when using a caulk gun. Taking the time to properly prepare your caulking surfaces ensures a clean and effective application without gaps or overflow.
Surface Cleaning and Preparation
Before applying caulk, always ensure that the surfaces are clean and dry. This helps the caulk adhere better, preventing common caulking mistakes like peeling or cracking. Use a scraper to remove old caulk and debris, followed by a clean cloth to wipe down the area. For a strong seal, consider applying a primer if you’re working with porous surfaces.
Choosing the Right Caulk
The type of caulk you choose will depend on the environment where it will be applied. For outdoor applications like caulking for insulation, waterproof caulk is essential to endure weather conditions. In contrast, for interior spaces like kitchens and bathrooms, opt for a mold-resistant silicone caulk. Ensure to follow the caulking guidelines for selecting the best product suitable for your task.
Tools Needed for Caulking
Besides your caulk gun, gather the necessary tools to improve your caulking efficiency. Essential tools include a utility knife for cutting the tip of the caulk tube, a caulking finisher for smoothing edges, and masks or drops cloths to protect areas from excess caulk. Smoothing caulk after application is vital for achieving a professional look and perfect finish.
Effective Caulking Techniques
Once you’ve prepared your surfaces and gathered your tools, it’s time to learn the best practices in applying caulk. Proper technique is key to achieving a durable seal.
How to Load Caulk Gun
Loading a caulk gun correctly is the first step to effective caulking. Start by cutting the tip of the caulk tube at a 45-degree angle, making sure it’s suited for the size of your gap. Insert the tube into the gun, pressing the plunger mechanism to secure it in place. Finally, puncture the seal at the tip using a long object (like a nail), which ensures a smooth flow when you begin
Applying Caulk with a Caulk Gun
To ensure an even application, hold the caulk gun at a 45-degree angle and apply steady pressure as you move along the gap. The key is consistency; aiming for a single, continuous bead will yield the best results. Avoid rushing this process to minimize overspill, which often leads to messy repairs.
Smoothing Caulk Edges
After applying the caulk, use a caulking finisher or your finger wetted with water or a soap solution to smooth the edges. Smoothing edges not only enhances aesthetics but also helps establish a waterproof seal. Remember, you should do this while the caulk is still wet for effective results.
Proper caulking techniques enhance the performance of your application, ensuring longevity and preventing damage over time. Engage in practice and persistence for successful caulking.
Maintenance and Cleanup After Caulking
Caring for your applied caulk can extend its lifespan significantly. Knowing how to maintain it is essential for any property owner.
Caulk Gun Maintenance
To ensure longevity of your caulk gun, follow the manufacturer’s instructions for cleaning. After each use, wipe the nozzle to prevent dried caulk from clogging it. Store the gun in a dry place with the tube removed when not in use. Proper care contributes to the overall efficiency and lifespan and optimizes your caulking efforts.
Cleaning Up After Caulking
Cleaning up after caulking can be a bit tricky since caulk can bond strongly to surfaces. Acetone or a commercial caulk remover will help dissolve any excess caulk. Wipe off any remaining traces with a rag before the caulk cures. The earlier you remove spills and excess, the easier it will be, keeping your surfaces neat and presentable.
When to Re-Caulk
Monitoring your caulk applications is essential, especially in areas prone to wear or weathering. Regularly look for signs of cracks, mold, or gaps which indicate it’s time to re-caulk. Identifying these signs early can maintain insulation and prevent moisture infiltration, saving you money and extending the life of your structures.
Key Takeaways
- Choosing the right caulk gun is essential for effective applications.
- Proper surface preparation and selecting appropriate caulk are crucial for lasting seals.
- Utilize the best practices for applying caulk, including smoothing edges to enhance aesthetic appeal.
- Regular maintenance of caulk and proper cleanup can extend service life considerably.
FAQ
1. What is the best caulk for windows?
The best caulk for windows usually comes in silicone or latex formulas, providing excellent waterproofing and flexibility. Silicone caulk is ideal for outdoor uses, while latex caulk is easier to paint.
2. How do you remove old caulk?
To remove old caulk, use a utility knife or a razor blade to scrape along the edges. A caulk remover can also help soften the caulk for easier removal. Remember to adequately clean the gap before applying new caulk.
3. What are some common caulking mistakes?
Some common caulking mistakes include applying caulk on dirty surfaces, over-application, and forgetting to smooth the caulk for a clean finish. Learning these can significantly improve your caulking job.
4. How often should you re-caulk?
Inspect your caulk regularly, aiming to re-caulk every 5-10 years, or sooner if signs of wear, such as cracks or mildew, appear. Proper maintenance can lead to better energy efficiency and prevent water damage.
5. Can I paint over caulk?
Yes, you can paint over latex caulk once it’s cured, but painting over silicone caulk can be problematic as most paints won’t adhere well. Always check the specifics of your caulk type.
6. How do I know which caulk to use for my project?
Select caulk based on where it will be used: for bathrooms, use mold-and-mildew-resistant caulk; for outdoor gaps, use waterproof caulk. Check labels and instructions for compatibility with surfaces.