How to Properly Paint a Door: 5 Expert Tips for a Modern Finish in 2025
Painting your door can significantly enhance the overall aesthetic of your home, adding character and modern flair. In this guide, we will cover essential tips and techniques on how to paint a door effectively. Whether painting interior doors or exterior doors, these expert insights ensure a professional finish that is both stylish and durable.
1. Preparing Your Door for Painting
Preparing your door is a crucial step in the painting process. Proper door prep work establishes a solid foundation for the paint, ensuring it adheres well and lasts longer. First, remove any hardware, such as handles and hinges, by following proper methods like how to remove door handles. After the hardware is off, clean the surface thoroughly. Using a mild soap solution will help eliminate dirt and oils. Next, inspect the door for any imperfections; if you encounter scratches or dents, sand them down to create a smooth surface.
Choosing the Right Paint
When selecting paint, one critical choice is between water-based vs oil-based paint. Water-based options are easier to clean and dry quickly, making them ideal for painting interior doors. In contrast, oil-based paints provide a smoother texture and exceptional durability, which can be beneficial for exterior doors. Additionally, consider environmentally friendly door paint options that reduce exposure to harmful fumes.
Tools and Supplies Needed
Having the right door painting supplies at hand can notably enhance the quality of your work. Essential tools include high-density foam rollers, brushes, painter’s tape, and paint stirrers. By using a brush for edges and a roller for flat surfaces, you can achieve a smooth, even coat on your door. It’s also helpful to protect your floors while painting. Lay down drop cloths or old newspapers to catch any drips or spatters.
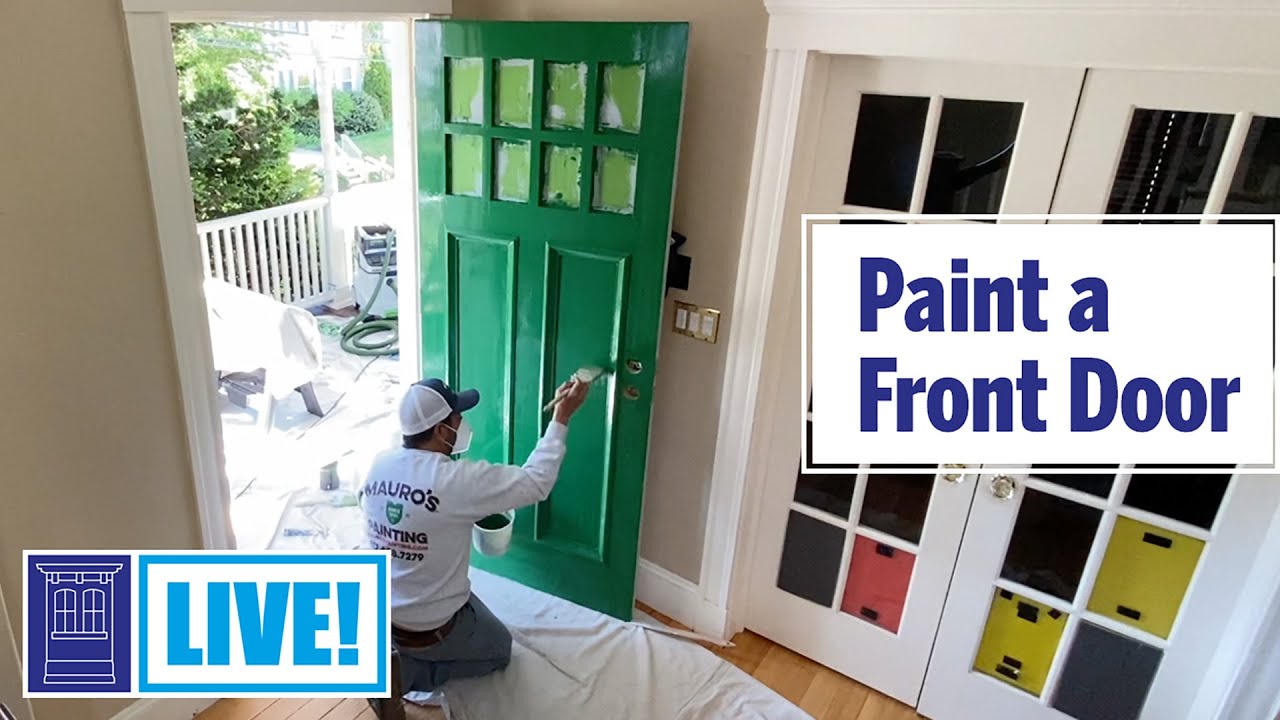
2. Techniques for Painting Your Door
Understanding various door painting techniques not only improves the aesthetic finish but also the drying time and durability of the paint. Start by priming the door, which is a crucial step if you are working with a previously unpainted surface or a color change. Priming a door helps the paint adhere better, ensuring consistent color and finish. After priming, choose to either use a roller for the bulk of the area or opt for a combination of brush and roller for more detailed work.
Brush vs Roller: Which to Use?
When using paint application methods, a common dilemma is brush vs roller. A brush is perfect for corners and intricate details, while a roller provides a smooth, uniform finish across larger, flat surfaces. For areas with raised panels or grooves, start by trimming with a brush, then follow up with a roller to fill in the flatter sections. This combination maximizes efficiency while ensuring every detail receives attention.
Applying the Coat(s)
After the prep work, it’s time to paint! Ideally, you want to apply at least two coats of paint for durability and appearance. Ensure the first coat is fully dry—pay attention to drying time for door paint. Once it’s touch-dry, inspect the surface for any drips or uneven spots and rectify them as needed by sanding. The final coat should leave the door looking flawless and professional.
3. Tips for a Smooth Finish and Touch-Ups
<p Achieving a smooth finish requires careful attention to detail throughout the painting process. One critical mistake is not following the correct application techniques as outlined. Take your time to apply thin, even coats, rather than thick ones that can lead to drips and uneven coloring. Use techniques for smooth paint finish that involve brushing softly but deliberately so as not to lift the previous layer.
How to Fix Drips
If you’ve noticed drips after the paint dries, don’t panic! A smooth finish can often be salvaged. Use fine-grit sandpaper to gently sand away the drip without damaging the surrounding area. After sanding, wipe clean, and reapply a thin layer of paint to blend it seamlessly. This is a pivotal step in understanding how to fix drips and maintain the overall quality of your artwork.
Understanding Paint Finishes
The choice of understanding paint finishes can impact both the look and functionality of your painted door. High-gloss paint provides a striking finish and makes cleaning easy, while satin finishes are more forgiving of imperfections. For doors that experience a lot of use or heavy traffic, consider semi-gloss paint—it offers durability without sacrificing aesthetic appeal.
4. Maintaining Your Painted Door
Once you’ve completed your painting project, knowing how to maintain your newly finished door is essential for preserving its appearance and longevity. Regularly check for scratches or wear and use touch-up painting techniques to address any imperfections as they arise. Keeping a small amount of leftover paint can be invaluable for future repairs.
Long-Term Door Maintenance Tips
Implementing maintenance of painted doors involves periodic cleaning and inspection. On a routine basis, wipe down the surface to remove dirt and grime with a damp cloth. Avoid harsh chemicals that can strip paint. It is also crucial to inspect hardware for any loosening due to weather fluctuations, particularly on exterior doors.
Protecting Hardware During Routine Maintenance
While maintaining or cleaning, ensure that you properly protect any door hardware. Use microfiber cloths around handles and hinges to prevent scratches and maintain aesthetic appeal. Explore more on what essentials are involved in making door crowns and ornate elements when seeking upkeep tips. A little attention goes a long way in ensuring your paint lasts beautifully.
Key Takeaways
- Proper door prep work and using the right tools ensures a smooth painting experience.
- Understanding different door painting techniques can optimize your workflow and results.
- Regular maintenance and timely touch-ups will extend the life of your painted doors.
- Choosing the right paint type and finish matters significantly for durability and aesthetics.
- Consult your resources for extensive decor ideas and solutions to common challenges in painting doors.
FAQ
1. What are the best painting hardware options?
When choosing painting hardware for your door, look for any equipment that’s corrosion-resistant. Stainless steel or brass materials tend to hold up better against elements. Make sure to invest in quality handles and hinges that match the style of your newly painted door.
2. How long does it take to paint a door?
Generally, the time frame for how long does it take to paint a door will depend on factors like drying time between coats and preparation work. On average, expect the process to take anywhere from one full day to two if you include proper preparation and multiple coats.
3. Can I paint doors without removing them?
Yes! Many choose to engage in painting doors without removing them. If this is the case, take precautions to protect surrounding areas and ensure thorough drying between coats. Using a feathering technique with your brush edges can help create a seamless blend.
4. How often should I repaint doors?
The frequency of repainting doors greatly depends on wear and exposure to elements. For interior doors, every 5-10 years might be sufficient; however, you may need to repaint exterior doors more frequently depending on their material and local climate conditions.
5. Are there eco-friendly paint options available?
Yes! There are many eco-friendly paint options on the market that offer low VOCs and sustainable resources. Brands offering these products cater to security and sustainability, simultaneously minimizing environmental impact while safeguarding indoor air quality.